1장.Gitops란?
GitOps는 인프라와 애플리케이션 배포 구성을 Git으로 관리하는 운영 방식이다.
모든 환경 상태를 Git 리포지토리의 선언형 코드로 정의하고, 변경 사항은 Pull Request를 통해 자동으로 배포 된다. 이를 통해 일관성, 추적성, 자동화된 배포 및 롤백이 가능해진다
2장.실습준비
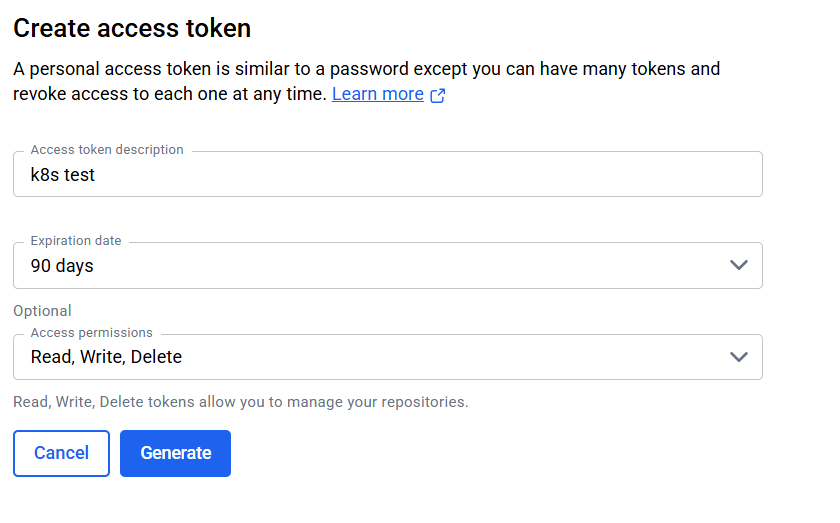
2.1. docker hub컨테이너 레지스트리 등록을 위한 액세스 토큰 생성
2.2 git저장소 등록(fork는 차주에 진행 실습을 위한 저장소 clone 진행)

git clone https://github.com/gitops-cookbook/chapters                                                                            Cloning into 'chapters'...
remote: Enumerating objects: 80, done.
remote: Counting objects: 100% (80/80), done.
remote: Compressing objects: 100% (55/55), done.
remote: Total 80 (delta 6), reused 74 (delta 4), pack-reused 0 (from 0)
Receiving objects: 100% (80/80), 64.80 KiB | 5.89 MiB/s, done.
Resolving deltas: 100% (6/6), done.
*이번 실습에선 사용하지 않지만 미리 포크 진행
2.3 로컬 쿠버네티스 클러스터 생성( WSL2(ubuntu) + Docker엔진 )
PS C:\WINDOWS\system32> dism.exe /online /enable-feature /featurename:Microsoft-Windows-Subsystem-Linux /all /norestart

배포 이미지 서비스 및 관리 도구
버전: 10.0.26100.1150

이미지 버전: 10.0.26100.3476

기능을 사용하도록 설정하는 중
[==========================100.0%==========================]
작업을 완료했습니다.
PS C:\WINDOWS\system32> dism.exe /online /enable-feature /featurename:VirtualMachinePlatform /all /norestart

배포 이미지 서비스 및 관리 도구
버전: 10.0.26100.1150

이미지 버전: 10.0.26100.3476

기능을 사용하도록 설정하는 중
[==========================100.0%==========================]
작업을 완료했습니다.
PS C:\WINDOWS\system32> wsl --set-default-version 2
WSL 2와의 주요 차이점에 대한 자세한 내용은 https://aka.ms/wsl2를 참조하세요

작업을 완료했습니다.
PS C:\WINDOWS\system32> wsl --update
업데이트 확인 중입니다.
Linux용 Windows 하위 시스템 최신 버전이 이미 설치되어 있습니다.
PS C:\WINDOWS\system32> wsl --list --online
다음은 설치할 수 있는 유효한 배포 목록입니다.
'wsl.exe --install <Distro>'을 사용하여 설치합니다.
NAME FRIENDLY NAME
AlmaLinux-8 AlmaLinux OS 8
AlmaLinux-9 AlmaLinux OS 9
AlmaLinux-Kitten-10 AlmaLinux OS Kitten 10
AlmaLinux-10 AlmaLinux OS 10
Debian Debian GNU/Linux
FedoraLinux-42 Fedora Linux 42
SUSE-Linux-Enterprise-15-SP6 SUSE Linux Enterprise 15 SP6
SUSE-Linux-Enterprise-15-SP7 SUSE Linux Enterprise 15 SP7
Ubuntu Ubuntu
Ubuntu-24.04 Ubuntu 24.04 LTS
archlinux Arch Linux
kali-linux Kali Linux Rolling
openSUSE-Tumbleweed openSUSE Tumbleweed
openSUSE-Leap-16.0 openSUSE Leap 16.0
Ubuntu-20.04 Ubuntu 20.04 LTS
Ubuntu-22.04 Ubuntu 22.04 LTS
OracleLinux_7_9 Oracle Linux 7.9
OracleLinux_8_10 Oracle Linux 8.10
OracleLinux_9_5 Oracle Linux 9.5
openSUSE-Leap-15.6 openSUSE Leap 15.6
PS C:\WINDOWS\system32> wsl --install Ubuntu-24.04
다운로드 중: Ubuntu 24.04 LTS
설치 중: Ubuntu 24.04 LTS
배포가 설치되었습니다. 'wsl.exe -d Ubuntu-24.04'을(를) 통해 시작할 수 있습니다
Static hostname: 4
Icon name: computer-container
Chassis: container ☐
Machine ID: 3933a21596f342e3b7513d6cdffbdde5
Boot ID: ef37164a0a9446ef8889b53d958c5778
Virtualization: wsl
Operating System: Ubuntu 24.04.3 LTS
Kernel: Linux 6.6.87.2-microsoft-standard-WSL2
Architecture: x86-64
...........중략..................
1주차 실습을 위한 클러스터 구성
docker ps
CONTAINER ID   IMAGE                  COMMAND                  CREATED         STATUS         PORTS                       NAMES
28aa4b70c8f0   kindest/node:v1.34.0   "/usr/local/bin/entr…"   3 minutes ago   Up 3 minutes   127.0.0.1:34961->6443/tcp   kind-control-plane

kind create cluster --name myk8s --image kindest/node:v1.32.8 --config - <<EOF
kind: Cluster
apiVersion: kind.x-k8s.io/v1alpha4
nodes:
- role: control-plane
  extraPortMappings:
  - containerPort: 30000
    hostPort: 30000
  - containerPort: 30001
    hostPort: 30001
- role: worker
EOF
Creating cluster "myk8s" ...
 ✓ Ensuring node image (kindest/node:v1.32.8) 🖼
 ✓ Preparing nodes 📦 📦
 ✓ Writing configuration 📜
 ✓ Starting control-plane 🕹️
 ✓ Installing CNI 🔌
 ✓ Installing StorageClass 💾
 ✓ Joining worker nodes 🚜
Set kubectl context to "kind-myk8s"
You can now use your cluster with:

kubectl cluster-info --context kind-myk8s

Have a nice day! 👋

kind get nodes --name myk8s
myk8s-worker
myk8s-control-plane

kubens default
✔ Active namespace is "default"
docker-desktop 환경이기에 172.18.0.0/16을 기본값으로 가지고있다.
docker inspect kind | jq
[
  {
    "Name": "kind",
    "Id": "3ca55a71d5d74b407bf59de9fc26adc1c08e5304b3a4f0923fe8a3e9ad35513e",
    "Created": "2025-10-14T23:54:09.750401976+09:00",
    "Scope": "local",
    "Driver": "bridge",
    "EnableIPv4": true,
    "EnableIPv6": true,
    "IPAM": {
      "Driver": "default",
      "Options": {},
      "Config": [
        {
          "Subnet": "fc00:f853:ccd:e793::/64"
        },
        {
          "Subnet": "172.18.0.0/16",
          "Gateway": "172.18.0.1"
        }
      ]
3장. 컨테이너
3.1 Docker를 이용한 이미지 빌드
컨테이너 이미지는 계층구조이며, Dockerfile은 이미지를 생성하기위한 명령어의 집합이라고 생각하면된다. 실습은 아까 git clone해놓은 소스로 진행
~/chapters/chapters/ch03/python-app$ ls
Dockerfile  app.py  requirements.txt
cat Dockerfile
FROM registry.access.redhat.com/ubi8/python-39
ENV PORT 8080
EXPOSE 8080
WORKDIR /usr/src/app

COPY requirements.txt ./
RUN pip install --no-cache-dir -r requirements.txt

COPY . .

ENTRYPOINT ["python"]
docker inspect $MYUSER/pythonapp:latest를 통해 확인해보면 아래와 같이 레이어가 8개임을 알수있다.
            "Layers": [
                "sha256:efbb01c414da9dbe80503875585172034d618260b0179622a67440af141ada49",
                "sha256:0e770dacd8dd8e0f783addb2f8e2889360ecc1443acc1ca32f03158f8b459b14",
                "sha256:88e9a9d0ae01242e58df8949eead610a48a097424286ea4b79578d4715a42a43",
                "sha256:f279945932ccc151ce3a30913fcee204cdd7c22812445100ecafde8a9d59ee90",
                "sha256:9a68b585f4d06dded75f1f9b9ef570d2a90c2d4f5fb0c593e27a7e47e0950980",
                "sha256:b714f69a1cb44a6dad57da75d65cdc810e493b91e7e2abfa55e56824729eefb9",
                "sha256:f169d82343d6db538cb505124b9bca4bb541d1646039da7ef53c82d366887392",
                "sha256:fc9e577685d62ded67ed62e0053c28c386a774bf7881e6eefa94899acba34392"
            ]
이는 Dockerfile에 작성되어있는 FROM registry.access.redhat.com/ubi8/python-39 이 레이어4개로 구성되어있어서 총 8개로 보이는것이다. 해당 이미지를 docker inspect로 확인해보면 구성된 레이어가 위에 8개중 상단4개와 동일함을 알수있다.
     docker inspect registry.access.redhat.com/ubi8/python-39:latest | jq
     ...중략....
      "Layers": [
        "sha256:efbb01c414da9dbe80503875585172034d618260b0179622a67440af141ada49",
        "sha256:0e770dacd8dd8e0f783addb2f8e2889360ecc1443acc1ca32f03158f8b459b14",
        "sha256:88e9a9d0ae01242e58df8949eead610a48a097424286ea4b79578d4715a42a43",
        "sha256:f279945932ccc151ce3a30913fcee204cdd7c22812445100ecafde8a9d59ee90"
      ]

docker history $MYUSER/pythonapp:latest
IMAGE          CREATED              CREATED BY                                      SIZE      COMMENT
bb2d2da792fb   About a minute ago   CMD ["app.py"]                                  0B        buildkit.dockerfile.v0
<missing>      About a minute ago   ENTRYPOINT ["python"]                           0B        buildkit.dockerfile.v0
<missing>      About a minute ago   COPY . . # buildkit                             404B      buildkit.dockerfile.v0
<missing>      About a minute ago   RUN /bin/sh -c pip install --no-cache-dir -r…   4.05MB    buildkit.dockerfile.v0
<missing>      About a minute ago   COPY requirements.txt ./ # buildkit             5B        buildkit.dockerfile.v0
<missing>      About a minute ago   WORKDIR /usr/src/app                            0B        buildkit.dockerfile.v0
<missing>      About a minute ago   EXPOSE [8080/tcp]                               0B        buildkit.dockerfile.v0
<missing>      About a minute ago   ENV PORT=8080                                   0B        buildkit.dockerfile.v0
docker push $MYREGISTRY/$MYUSER/pythonapp:latest
The push refers to repository [docker.io/zeroone5727/pythonapp]
fc9e577685d6: Pushed
f169d82343d6: Pushed
b714f69a1cb4: Pushed
9a68b585f4d0: Pushed
f279945932cc: Pushed
88e9a9d0ae01: Pushed
0e770dacd8dd: Pushed
efbb01c414da: Pushed
latest: digest: sha256:539e05b6d7aa958d21742efc5542cccc78273c226ef4663fca0065b709359df6 size: 1999
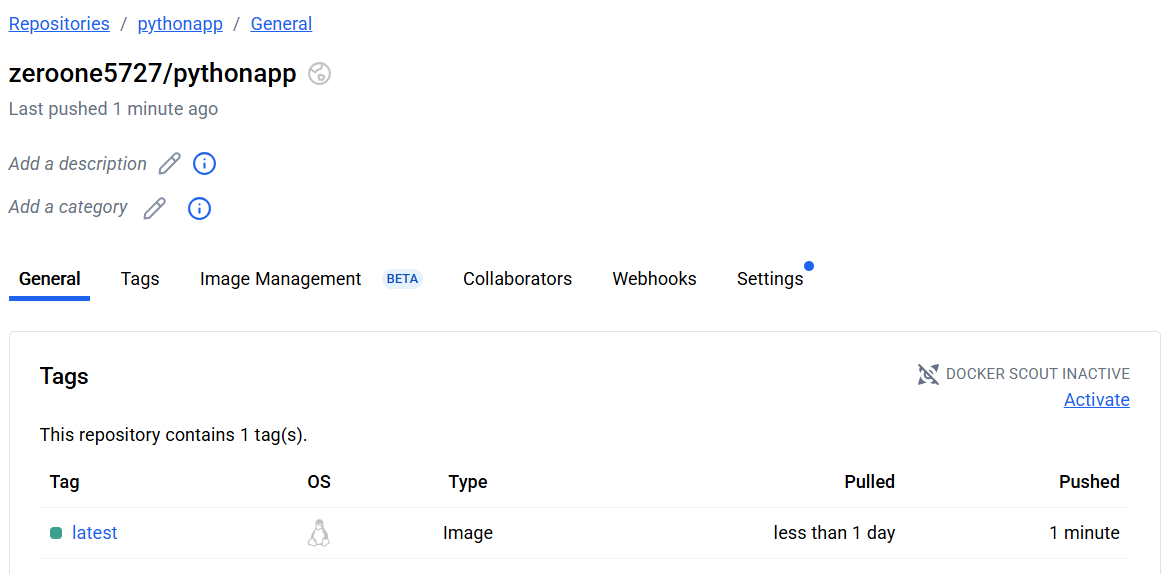
푸시된 이미지를 실행하고 해당 컨테이너 로그를 확인
docker run -d --name myweb -p 8080:8080 -it $MYREGISTRY/$MYUSER/pythonapp:latest

docker logs myweb
 * Serving Flask app 'app'
 * Debug mode: on
WARNING: This is a development server. Do not use it in a production deployment. Use a production WSGI server instead.
 * Running on all addresses (0.0.0.0)
 * Running on http://127.0.0.1:8080
 * Running on http://172.17.0.2:8080
Press CTRL+C to quit
 * Restarting with stat
 * Debugger is active!
 * Debugger PIN: 764-598-955
172.17.0.1 - - [14/Oct/2025 16:30:23] "GET / HTTP/1.1" 200 -
172.17.0.1 - - [14/Oct/2025 16:30:23] "GET /favicon.ico HTTP/1.1" 404 -
3.2 도커가 필요 없는 Jib을 사용한 컨테이너 빌드
Dockerfile을 작성하지않아도되는점이 큰장점이지만 java기반에서만 사용가능하다는 단점이있다.
WSL2환경에서의 jib실습환경구축
root@myk8s-worker:/# java -version
openjdk version "17.0.16" 2025-07-15
OpenJDK Runtime Environment (build 17.0.16+8-Debian-1deb12u1)
OpenJDK 64-Bit Server VM (build 17.0.16+8-Debian-1deb12u1, mixed mode, sharing)

mvn -version
Apache Maven 3.8.7
Maven home: /usr/share/maven
Java version: 17.0.16, vendor: Debian, runtime: /usr/lib/jvm/java-17-openjdk-amd64
Default locale: en_US, platform encoding: ANSI_X3.4-1968
OS name: "linux", version: "6.6.87.2-microsoft-standard-wsl2", arch: "amd64", family: "unix"

mvn compile com.google.cloud.tools:jib-maven-plugin:3.4.6:build   -Dimage=docker.io/zeroone5727/jib-example:latest   -Djib.to.auth.username=zeroone5727   -Djib.to.auth.password=""   -Djib.from.platforms=linux/amd64
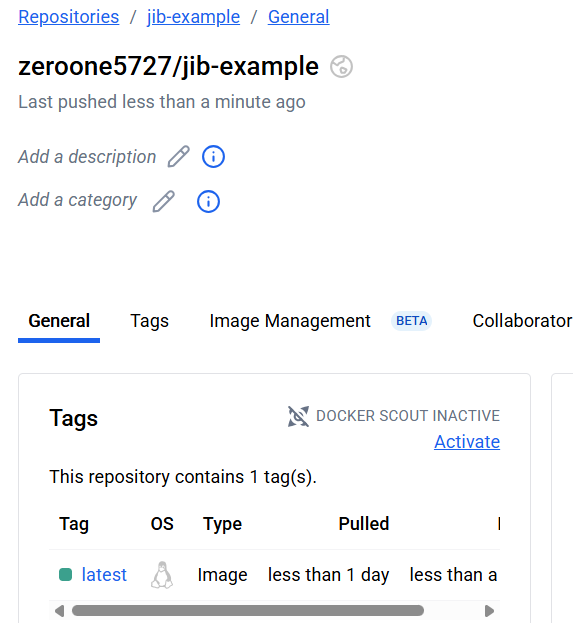
docker run -d --name myweb2 -p 8080:8080 -it docker.io/zeroone5727/jib-example
Unable to find image 'zeroone5727/jib-example:latest' locally
latest: Pulling from zeroone5727/jib-example
4b3ffd8ccb52: Pull complete
0b2668578c63: Pull complete
0b04dbdb2b3f: Pull complete
fd4132a90b04: Pull complete
43cbcd26df05: Pull complete
80179ad604dc: Pull complete
6d6cf0398708: Pull complete
d2bcf32f8182: Pull complete
d3589b3a4a64: Pull complete
Digest: sha256:63b47bedc99cb91c3e690d4942f4608045534078b992c04374f4cde40601ae9a
Status: Downloaded newer image for zeroone5727/jib-example:latest
a4f8a5cf3461ec62c81b98c93451d644cd0138636449f690f3f00b60ffaea938

curl -s 127.0.0.1:8080/hello | jq
{
  "id": 1,
  "content": "Hello, World!"
}
root@4:~# docker images
REPOSITORY                                  TAG       IMAGE ID       CREATED          SIZE
zeroone5727/pythonapp                       latest    bb2d2da792fb   32 minutes ago   878MB
registry.access.redhat.com/ubi8/python-39   latest    a160f0c65897   11 hours ago     874MB
kindest/node                                <none>    4357c93ef232   6 weeks ago      985MB
kindest/node                                v1.32.8   05f8e4e76c17   6 weeks ago      1.04GB
zeroone5727/jib-example                     latest    2574b2ca2237   55 years ago     281MB
root@4:~# docker inspect zeroone5727/jib-example | jq
[
  {
    "Id": "sha256:2574b2ca2237d60e4a63e86ed4883e1306e369e824937cd6587857ec9fc3eb4c",
    "RepoTags": [
3.3 빌다(Buildah)를 사용한 컨테이너빌드
*빌다는 Mac에서는 테스트가 불가능하다.(리눅스하위시스템이 반드시필요)
컨테이너 내부 podman설치 및 버젼확인하기
(⎈|BINARY-N/A:N/A) zosys@4:~/chapters/chapters/ch03$ docker exec -it myk8s-control-plane bash

root@myk8s-control-plane:/# apt update
Get:1 http://deb.debian.org/debian bookworm InRelease [151 kB]
Get:2 http://deb.debian.org/debian bookworm-updates InRelease [55.4 kB]
Get:3 http://deb.debian.org/debian-security bookworm-security InRelease [48.0 kB]


----중략---------
root@myk8s-control-plane:/# apt install podman -y
Reading package lists... Done
Building dependency tree... Done
Reading state information... Done
The following additional packages will be installed:

----중략---------
root@myk8s-control-plane:/# podman version
Client:       Podman Engine
Version:      4.3.1
API Version:  4.3.1
Go Version:   go1.19.8
Built:        Thu Jan  1 00:00:00 1970
OS/Arch:      linux/amd64


root@myk8s-control-plane:/# buildah version
Version:         1.28.2
Go Version:      go1.19.8
Image Spec:      1.1.0-rc2
Runtime Spec:    1.0.2-dev
CNI Spec:        1.0.0
libcni Version:
image Version:   5.23.1
Git Commit:
Built:           Thu Jan  1 00:00:00 1970
OS/Arch:         linux/amd64
BuildPlatform:   linux/amd64
빌다 이미지 빌드 및 파드맨 확인
root@myk8s-control-plane:/# buildah from centos:latest
Resolved "centos" as an alias (/etc/containers/registries.conf.d/shortnames.conf)
Trying to pull quay.io/centos/centos:latest...
Getting image source signatures
Copying blob bf573055768d done
Copying config 4fbde73dcc done
Writing manifest to image destination
Storing signatures
centos-working-container
root@myk8s-control-plane:/# buildah images
REPOSITORY TAG IMAGE ID CREATED SIZE
quay.io/centos/centos latest 4fbde73dcc66 2 days ago 316 MB
#이미지 빌드를 위한 빌다의 전용 컨테이너
root@myk8s-control-plane:/# buildah containers
CONTAINER ID BUILDER IMAGE ID IMAGE NAME CONTAINER NAME
ffac44263205 * 4fbde73dcc66 quay.io/centos/centos:latest centos-working-container
root@myk8s-control-plane:/# buildah run centos-working-container yum install -y httpd
CentOS Stream 10 - BaseOS 3.2 MB/s | 6.8 MB 00:02
CentOS Stream 10 - AppStream 2.6 MB/s | 3.4 MB 00:01
CentOS Stream 10 - Extras packages 9.9 kB/s | 7.3 kB 00:00
Dependencies resolved.
========================================================================================================================
Package Architecture Version Repository Size
========================================================================================================================
Installing:
-------------------------중략----------------------------
root@myk8s-control-plane:/# cat << EOF > index.html
<html>
<head>
<title>Cloudneta CICD Study GOGO</title>
</head>
<body>
<h1>Hello, World!</h1>
</body>
</html>
EOF
root@myk8s-control-plane:/# buildah copy centos-working-container index.html /var/www/html/index.html
48dc53b65b887ca53f119b8098e06f39dd107d202c8d5e78f6406cf7b7d50123
root@myk8s-control-plane:/# buildah config --entrypoint "/usr/sbin/httpd -DFOREGROUND" centos-working-container
WARN[0000] cmd "/bin/bash" exists but will be ignored because of entrypoint settings
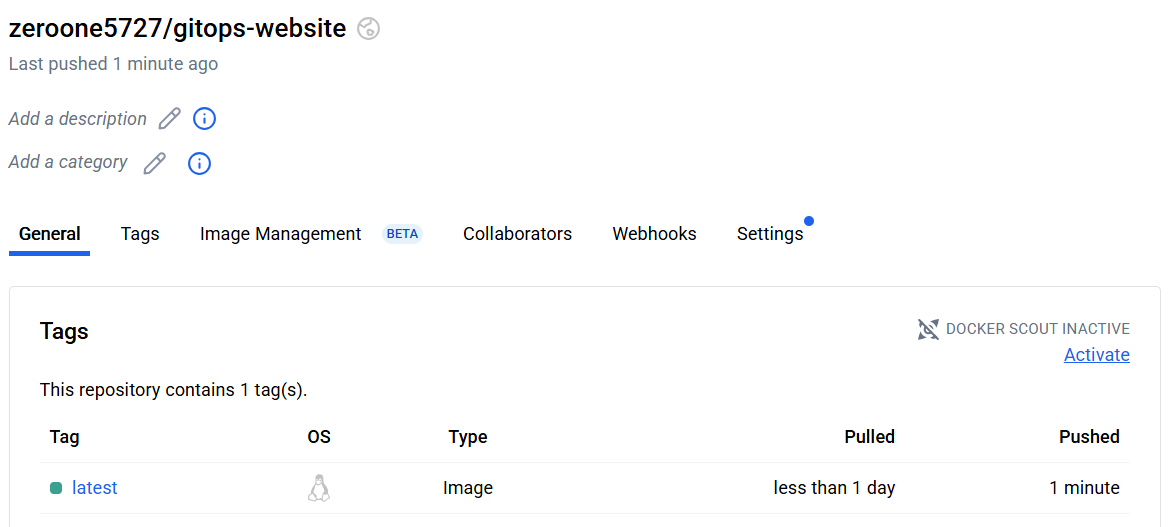
root@myk8s-control-plane:/# buildah commit centos-working-container docker.io/zeroone5727/gitops-website
Getting image source signatures
Copying blob 288e9c66457d skipped: already exists
Copying blob bd8d16be1d7e done
Copying config 0558748eaf done
Writing manifest to image destination
Storing signatures
0558748eaf4d4fdd32ed525aad5ab88bdb1e8f2e4e9bd7308ff9ec4416317fdf
root@myk8s-control-plane:/# podman run --runtime /usr/local/sbin/runc -d --name myweb -p 8080:80 -it docker.io/zeroone5727/gitops-website
fc007ee6906f12028494b4e24d7ec092bf4e0107c5847fab563f7a71a19d8f9d
root@myk8s-control-plane:/# podman ps
CONTAINER ID IMAGE COMMAND CREATED STATUS PORTS NAMES
fc007ee6906f docker.io/zeroone5727/gitops-website:latest /bin/bash 3 seconds ago Up 3 seconds ago 0.0.0.0:8080->80/tcp myweb
root@myk8s-control-plane:/# curl -s localhost:8080
<html>
<head>
<title>Cloudneta CICD Study GOGO</title>
</head>
<body>
<h1>Hello, World!</h1>
</body>
</html>
Dockerfile로 buildah 이미지 빌드해보기
oot@myk8s-control-plane:/# cat << EOF > Dockerfile
FROM centos:latest
RUN yum -y install httpd
COPY index.html /var/www/html/index.html
EXPOSE 80
CMD ["/usr/sbin/httpd", "-DFOREGROUND"]
EOF

root@myk8s-control-plane:/# buildah build -f Dockerfile -t docker.io/zeroone5727/gitops-website
STEP 1/5: FROM centos:latest
STEP 2/5: RUN yum -y install httpd
CentOS Stream 10 - BaseOS                       3.0 MB/s | 6.8 MB     00:02
CentOS Stream 10 - AppStream                    1.3 MB/s | 3.4 MB     00:02
CentOS Stream 10 - Extras packages              7.7 kB/s | 7.3 kB     00:00
Dependencies resolved.
================================================================================
 Package                 Arch        Version               Repository      Size
================================================================================
Installing:
 httpd                   x86_64      2.4.63-5.el10         appstream       49 k
---------------------중략-------------------------


root@myk8s-control-plane:/# buildah images
REPOSITORY                             TAG      IMAGE ID       CREATED          SIZE
docker.io/zeroone5727/gitops-website   latest   7db81e718f5b   30 seconds ago   361 MB
이미지를 도커레지스트리에 push해보기
root@myk8s-control-plane:/# buildah login --username zeroone5727 docker.io
Password:
Login Succeeded!

root@myk8s-control-plane:/# buildah push 7db81e718f5b docker.io/zeroone5727/gitops-website
Getting image source signatures
Copying blob 0209c55c26e9 done
Copying blob 288e9c66457d done
Copying config 7db81e718f done
Writing manifest to image destination
Storing signatures
3.4 빌드팩을 통한 컨테이너 빌드
빌드팩은 두가지 단계로 진행된다
- 탐지
- 빌드팩은 소스 코드를 탐색하여 프로그래밍 언어나 프레임워크를 무엇을 사용하는지 파악하고 해당 소스 코드 빌드에 가장 적합한 빌드팩을 선정한다.
- 빌드
- 빌드팩이 결정되면 소스는 컴파일되고, 빌드팩은 엔트리포인트와 시작 스크립트가 포함된 컨테이너 이미지를 만든다.
빌드팩 설치하기(WSL2 Ubuntu)
root@4:~# sudo add-apt-repository ppa:cncf-buildpacks/pack-cli
Repository: 'Types: deb
URIs: https://ppa.launchpadcontent.net/cncf-buildpacks/pack-cli/ubuntu/
Suites: noble
Components: main
'
Description:
CLI for building apps using Cloud Native Buildpacks
More info: https://launchpad.net/~cncf-buildpacks/+archive/ubuntu/pack-cli
Adding repository.
Press [ENTER] to continue or Ctrl-c to cancel.

root@4:~# apt-get install -y pack-cli
Reading package lists... Done
Building dependency tree... Done
Reading state information... Done

root@4:~# pack version
0.38.2
root@4:~# pack --help
CLI for building apps using Cloud Native Buildpacks

Usage:
  pack [command]
nodejs샘플 빌드팩으로 이미지 만들어보기(이미지 생성시에 빌더 지정)
(⎈|BINARY-N/A:N/A) zosys@4:~/chapters/chapters/ch03/nodejs-app$ sudo pack builder suggest
Suggested builders:
        Google:                gcr.io/buildpacks/builder:google-22                     Ubuntu 22.04 base image with buildpacks for .NET, Dart, Go, Java, Node.js, PHP, Python, and Ruby
        Heroku:                heroku/builder:24                                       Ubuntu 24.04 AMD64+ARM64 base image with buildpacks for .NET, Go, Java, Node.js, PHP, Python, Ruby & Scala.
        Paketo Buildpacks:     paketobuildpacks/builder-jammy-base                     Ubuntu 22.04 Jammy Jellyfish base image with buildpacks for Java, Go, .NET Core, Node.js, Python, Apache HTTPD, NGINX and Procfile
        Paketo Buildpacks:     paketobuildpacks/builder-jammy-buildpackless-static     Static base image (Ubuntu Jammy Jellyfish build image, distroless-like run image) with no buildpacks included. To use, specify buildpacks at build time.
        Paketo Buildpacks:     paketobuildpacks/builder-jammy-full                     Ubuntu 22.04 Jammy Jellyfish full image with buildpacks for Apache HTTPD, Go, Java, Java Native Image, .NET, NGINX, Node.js, PHP, Procfile, Python, and Ruby
        Paketo Buildpacks:     paketobuildpacks/builder-jammy-tiny                     Tiny base image (Ubuntu Jammy Jellyfish build image, distroless-like run image) with buildpacks for Java, Java Native Image and Go
        Paketo Buildpacks:     paketobuildpacks/builder-ubi8-base                      Ubi 8 base builder with buildpacks for Node.js, Java, Quarkus and Procfile

Tip: Learn more about a specific builder with:
        pack builder inspect <builder-image>

(⎈|BINARY-N/A:N/A) zosys@4:~/chapters/chapters/ch03/nodejs-app$ sudo pack build nodejs-app --builder paketobuildpacks/builder-jammy-base
latest: Pulling from paketobuildpacks/builder-jammy-base

(⎈|BINARY-N/A:N/A) zosys@4:~/chapters/chapters/ch03/nodejs-app$ docker images
REPOSITORY                                  TAG       IMAGE ID       CREATED        SIZE
paketobuildpacks/run-jammy-base             latest    d255418a9350   11 hours ago   111MB
zeroone5727/pythonapp                       latest    bb2d2da792fb   46 hours ago   878MB
registry.access.redhat.com/ubi8/python-39   latest    a160f0c65897   2 days ago     874MB
kindest/node                                <none>    4357c93ef232   7 weeks ago    985MB
kindest/node                                v1.32.8   05f8e4e76c17   7 weeks ago    1.04GB
paketobuildpacks/builder-jammy-base         latest    58ba6d7beab5   45 years ago   2.5GB
nodejs-app                                  latest    2aee05010faa   45 years ago   374MB

(⎈|BINARY-N/A:N/A) zosys@4:~/chapters/chapters/ch03/nodejs-app$ docker inspect nodejs-app | jq | more
[
  {
    "Id": "sha256:2aee05010faa0effb34b6443be5cbab411a1768c00f5eb6b43d5bec9510bbcfd",
    "RepoTags": [
      "nodejs-app:latest"
    ],
    "RepoDigests": [],
    "Parent": "",
    "Comment": "",
    "Created": "1980-01-01T00:00:01Z",
    "DockerVersion": "",
    "Author": "",
    "Architecture": "amd64",
    "Os": "linux",
    "Size": 374370403,
    "GraphDriver": {
--------중략------------

(⎈|BINARY-N/A:N/A) zosys@4:~/chapters/chapters/ch03/nodejs-app$ docker run -d --name myapp --rm -p 3000:3000 nodejs-app
41ffa68b998ef52cfe88afaae8b5ed95678cc6289fe2542563208ea88b2f4739
(⎈|BINARY-N/A:N/A) zosys@4:~/chapters/chapters/ch03/nodejs-app$ docker ps -a
CONTAINER ID   IMAGE                  COMMAND                  CREATED         STATUS             PORTS                                                             NAMES
41ffa68b998e   nodejs-app             "/cnb/process/web"       2 seconds ago   Up 1 second        0.0.0.0:3000->3000/tcp, [::]:3000->3000/tcp                       myapp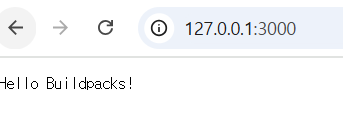
3.5 십라이트 빌다 카니코를 이용한 이미지 빌드 (쿠버네티스이용)
쿠버네티스는 이미지 빌드를 지원하지않으며, 그 대체제로 사용되는것이 CI/CD툴 또는 빌드관리 프레임워크가 있는데, 그중 십라이트라는 프레임워크를 사용해본다.
kind K8s에 십라이트설치
root@myk8s-control-plane:/# kubectl apply -f https://storage.googleapis.com/tekton-releases/pipeline/previous/v0.70.0/release.yaml
\^Hnamespace/tekton-pipelines created
-----------중략------------------

root@myk8s-control-plane:/# kubectl get crd
NAME                                       CREATED AT
clustertasks.tekton.dev                    2025-10-16T15:03:37Z
customruns.tekton.dev                      2025-10-16T15:03:38Z
pipelineruns.tekton.dev                    2025-10-16T15:03:38Z
pipelines.tekton.dev                       2025-10-16T15:03:38Z
resolutionrequests.resolution.tekton.dev   2025-10-16T15:03:38Z
stepactions.tekton.dev                     2025-10-16T15:03:38Z
taskruns.tekton.dev                        2025-10-16T15:03:38Z
tasks.tekton.dev                           2025-10-16T15:03:38Z
verificationpolicies.tekton.dev            2025-10-16T15:03:38Z
root@myk8s-control-plane:/# kubectl get sa -n tekton-pipelines
NAME                          SECRETS   AGE
default                       0         34s
tekton-events-controller      0         34s
tekton-pipelines-controller   0         34s
tekton-pipelines-webhook      0         34s

root@myk8s-control-plane:/# kubectl apply -f https://github.com/shipwright-io/build/releases/download/v0.11.0/release.yaml
namespace/shipwright-build created
role.rbac.authorization.k8s.io/shipwright-build-controller created
clusterrole.rbac.authorization.k8s.io/shipwright-build-controller created
clusterrolebinding.rbac.authorization.k8s.io/shipwright-build-controller created
rolebinding.rbac.authorization.k8s.io/shipwright-build-controller created
serviceaccount/shipwright-build-controller created
deployment.apps/shipwright-build-controller created
clusterrole.rbac.authorization.k8s.io/shipwright-build-aggregate-edit created
clusterrole.rbac.authorization.k8s.io/shipwright-build-aggregate-view created
customresourcedefinition.apiextensions.k8s.io/buildruns.shipwright.io created
customresourcedefinition.apiextensions.k8s.io/builds.shipwright.io created
customresourcedefinition.apiextensions.k8s.io/buildstrategies.shipwright.io created
customresourcedefinition.apiextensions.k8s.io/clusterbuildstrategies.shipwright.io created

root@myk8s-control-plane:/# kubectl apply -f https://github.com/shipwright-io/build/releases/download/v0.11.0/sample-strategies.yaml
clusterbuildstrategy.shipwright.io/buildah created
clusterbuildstrategy.shipwright.io/buildkit created
clusterbuildstrategy.shipwright.io/buildpacks-v3-heroku created
clusterbuildstrategy.shipwright.io/buildpacks-v3 created
clusterbuildstrategy.shipwright.io/kaniko-trivy created
clusterbuildstrategy.shipwright.io/kaniko created
clusterbuildstrategy.shipwright.io/ko created
clusterbuildstrategy.shipwright.io/source-to-image-redhat created
clusterbuildstrategy.shipwright.io/source-to-image created
root@myk8s-control-plane:/# kubectl get-all -n shipwright-build


root@myk8s-control-plane:/# kubectl get clusterbuildstrategy
NAME                     AGE
buildah                  117s
buildkit                 117s
buildpacks-v3            117s
buildpacks-v3-heroku     117s
kaniko                   117s
kaniko-trivy             117s
ko                       117s
source-to-image          117s
source-to-image-redhat   117s

root@myk8s-control-plane:/# kubectl get clusterbuildstrategy buildah -o yaml
apiVersion: shipwright.io/v1alpha1
kind: ClusterBuildStrategy
metadata:
  annotations:
    kubectl.kubernetes.io/last-applied-configuration: |
      {"apiVersion":"shipwright.io/v1alpha1","kind":"ClusterBuildStrategy","metadata":{"annotations":{},"name":"buildah"},"spec":{"buildSteps":[{"args":["-c","set -euo pipefail\n
시크릿생성 (생성안할경우 아래와 같이 에러발생함)
root@myk8s-control-plane:/# k get build
NAME                  REGISTERED   REASON                        BUILDSTRATEGYKIND      BUILDSTRATEGYNAME   CREATIONTIME
kaniko-golang-build   False        SpecOutputSecretRefNotFound   ClusterBuildStrategy   kaniko              6m3s


root@myk8s-control-plane:/# kubectl create secret docker-registry push-secret \
--docker-server=$REGISTRY_SERVER \
--docker-username=$REGISTRY_USER \
--docker-password=$REGISTRY_PASSWORD \
--docker-email=$EMAIL

root@myk8s-control-plane:/# k get secret
NAME          TYPE                             DATA   AGE
push-secret   kubernetes.io/dockerconfigjson   1      48s
빌드객체 생성 및 빌드런객체생성하여 파드생성
# Build 객체 생성
cat <<EOF | kubectl apply -f -
apiVersion: shipwright.io/v1alpha1
kind: Build
metadata:
  name: kaniko-golang-build
  annotations:
    build.shipwright.io/build-run-deletion: "true"   # 빌드 완료 후 BuildRun 삭제
spec:
  source:
    url: https://github.com/shipwright-io/sample-go  # 소스 코드를 가져올 저장소
    contextDir: docker-build                         # 소스 코드가 있는 디렉터리
  strategy:
    name: kaniko                                     # 빌드에 사용할 ClusterBuildStrategy 이름
    kind: ClusterBuildStrategy
  dockerfile: Dockerfile
  output:
    image: docker.io/$REGISTRY_USER/sample-golang:latest # 결과 이미지를 저장할 장소
    credentials:
      name: push-secret                              # 레지스트리에 인증하고 이미지를 푸시하는 데 사용할 시크릿 이름
EOF


root@myk8s-control-plane:/# kubectl create -f buildrun-go.yaml
buildrun.shipwright.io/kaniko-golang-buildrun-6zphv created

cat << EOF > buildrun-go.yaml
apiVersion: shipwright.io/v1alpha1
kind: BuildRun
metadata:
  generateName: kaniko-golang-buildrun-
spec:
  buildRef:
    name: kaniko-golang-build
EOF

root@myk8s-control-plane:/# k get build
NAME                  REGISTERED   REASON      BUILDSTRATEGYKIND      BUILDSTRATEGYNAME   CREATIONTIME
kaniko-golang-build   True         Succeeded   ClusterBuildStrategy   kaniko              6m17s

root@myk8s-control-plane:/# k get pod -n default -w
NAME                                     READY   STATUS     RESTARTS   AGE
kaniko-golang-buildrun-6zphv-gf5d4-pod   0/3     Init:1/2   0          11s
kaniko-golang-buildrun-6zphv-gf5d4-pod   0/3     PodInitializing   0          11s
-------중략-----------------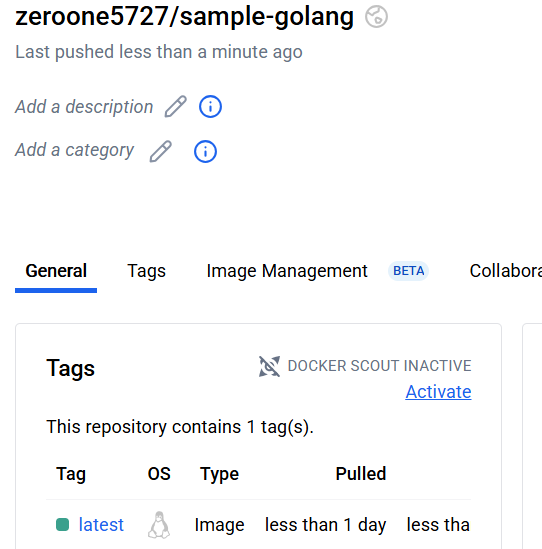
root@myk8s-control-plane:/# kubectl describe pod -l clusterbuildstrategy.shipwright.io/name=kaniko | more
Name:             kaniko-golang-buildrun-6zphv-gf5d4-pod
Namespace:        default
Priority:         0
Service Account:  default
Node:             myk8s-worker/172.18.0.4
Start Time:       Thu, 16 Oct 2025 15:25:42 +0000
Labels:           app.kubernetes.io/managed-by=tekton-pipelines
                  build.shipwright.io/generation=2
                  build.shipwright.io/name=kaniko-golang-build
                  buildrun.shipwright.io/generation=1
                  buildrun.shipwright.io/name=kaniko-golang-buildrun-6zphv
                  clusterbuildstrategy.shipwright.io/generation=1
                  clusterbuildstrategy.shipwright.io/name=kaniko
                  tekton.dev/taskRun=kaniko-golang-buildrun-6zphv-gf5d4
                  tekton.dev/taskRunUID=99cfed13-b622-4ba2-9707-a4c1

root@myk8s-control-plane:/# kubectl get buildruns.shipwright.io
NAME                           SUCCEEDED   REASON      STARTTIME   COMPLETIONTIME
kaniko-golang-buildrun-6zphv   True        Succeeded   19m         16m
4장 커스터마이즈
- 쿠버네티스 배포는 결국 YAML 파일을 클러스터에 적용하는 단순한 작업이다.
- 어려운 부분은 YAML의 첫 버전을 만드는 초기 개발 단계다.
- 이후 환경별 설정 파일로 변경 사항만 관리하는 도구(커스터마이즈)를 사용하면 실수와 위험을 줄일 수 있다
configMapGenerator
(⎈|kind-myk8s:default) zosys@4:~$ mkdir kustomize-test
(⎈|kind-myk8s:default) zosys@4:~$ cd kustomize-test/
(⎈|kind-myk8s:default) zosys@4:~/kustomize-test$

(⎈|kind-myk8s:default) zosys@4:~/kustomize-test$ cat <<EOF > application.properties
FOO=Bar
EOF

cat <<EOF > kustomization.yaml
configMapGenerator:
- name: example-configmap-1
  files:
  - application.properties
EOF
(⎈|kind-myk8s:default) zosys@4:~/kustomize-test$ kubectl create -k ./ --dry-run=client -o yaml --save-config=false
apiVersion: v1
data:
  application.properties: |
    FOO=Bar
kind: ConfigMap
metadata:
  name: example-configmap-1-g4hk9g2ff8
  namespace: default

(⎈|kind-myk8s:default) zosys@4:~/kustomize-test$ k create -k ./ --save-config=false
configmap/example-configmap-1-g4hk9g2ff8 created
(⎈|kind-myk8s:default) zosys@4:~/kustomize-test$ k get -k ./
NAME                             DATA   AGE
example-configmap-1-g4hk9g2ff8   1      3s
(⎈|kind-myk8s:default) zosys@4:~/kustomize-test$ k describe -k ./
Name:         example-configmap-1-g4hk9g2ff8
Namespace:    default
Labels:       <none>
Annotations:  <none>

Data
====
application.properties:
----
FOO=Bar


BinaryData
====
Custormizing
(⎈|kind-myk8s:default) zosys@4:~/kustomize-test$ cat << EOF > deployment.yaml
apiVersion: apps/v1
kind: Deployment
metadata:
  name: my-nginx
spec:
  selector:
    matchLabels:
      run: my-nginx
  replicas: 2
  template:
    metadata:
      labels:
        run: my-nginx
    spec:
      containers:
      - name: my-nginx
        image: nginx:alpine
        ports:
        - containerPort: 80
EOF


(⎈|kind-myk8s:default) zosys@4:~/kustomize-test$ cat << EOF > increase_replicas.yaml
apiVersion: apps/v1
kind: Deployment
metadata:
  name: my-nginx
spec:
  replicas: 3
EOF

(⎈|kind-myk8s:default) zosys@4:~/kustomize-test$ cat << EOF > set_memory.yaml
apiVersion: apps/v1
kind: Deployment
metadata:
  name: my-nginx
spec:
  template:
    spec:
      containers:
      - name: my-nginx
        resources:
          limits:
            memory: 512Mi
EOF

(⎈|kind-myk8s:default) zosys@4:~/kustomize-test$ kubectl create -k ./ --dry-run=client -o yaml --save-config=false
apiVersion: apps/v1
kind: Deployment
metadata:
  name: my-nginx
  namespace: default
spec:
  replicas: 3
  selector:
    matchLabels:
      run: my-nginx
  template:
    metadata:
      labels:
        run: my-nginx
    spec:
      containers:
      - image: nginx:alpine
        name: my-nginx
        ports:
        - containerPort: 80
        resources:
          limits:
            memory: 512Mi

(⎈|kind-myk8s:default) zosys@4:~/kustomize-test$ k get -k ./
NAME       READY   UP-TO-DATE   AVAILABLE   AGE
my-nginx   3/3     3            3           11s

(⎈|kind-myk8s:default) zosys@4:~/kustomize-test$ k describe -k ./
Name:                   my-nginx
Namespace:              default
CreationTimestamp:      Fri, 17 Oct 2025 01:17:42 +0900
Labels:                 <none>
Annotations:            deployment.kubernetes.io/revision: 1
Selector:               run=my-nginx
Replicas:               3 desired | 3 updated | 3 total | 3 available | 0 unavailable
StrategyType:           RollingUpdate
MinReadySeconds:        0
RollingUpdateStrategy:  25% max unavailable, 25% max surge
Pod Template:
  Labels:  run=my-nginx
  Containers:
   my-nginx:
    Image:      nginx:alpine
    Port:       80/TCP
    Host Port:  0/TCP
    Limits:
      memory:      512Mi
Drangonfly
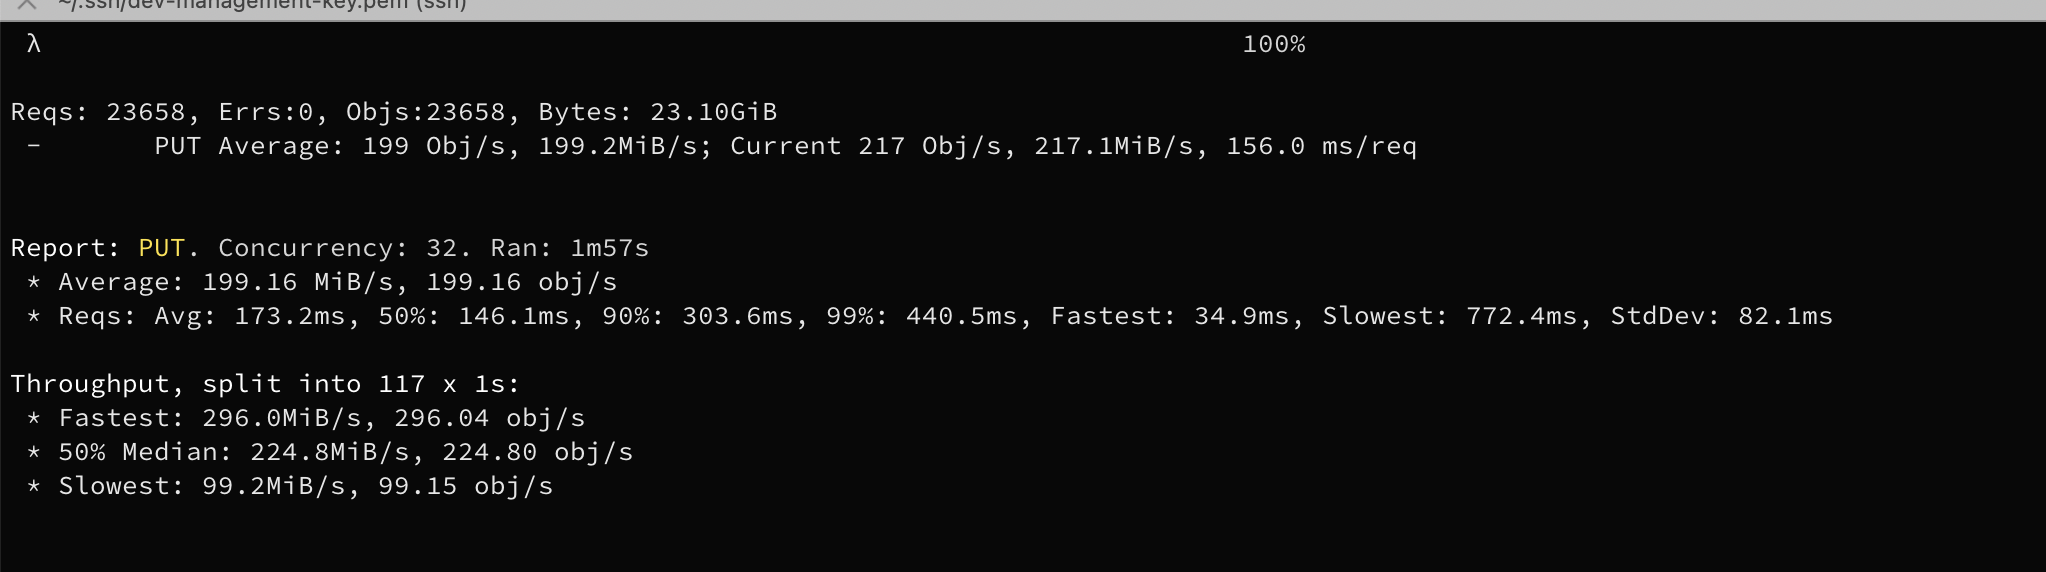
대규모의 이미지를 자주 다운 받을때 배포 효율성을 높이는 이미지 가속 솔루션(P2P방식)
구성요소는 관리자와 스케쥴러 시드피어 피어로 구성되어있다.
QuickStart
(⎈|kind-myk8s:default) zosys@4:~/kustomize-test$ docker pull dragonflyoss/scheduler:latest
docker pull dragonflyoss/manager:latest
docker pull dragonflyoss/client:latest
docker pull dragonflyoss/dfinit:latest
docker images

REPOSITORY                                  TAG       IMAGE ID       CREATED        SIZE
dragonflyoss/client                         latest    2e88f9c8964a   4 hours ago    749MB
dragonflyoss/dfinit                         latest    21578e98cbbf   4 hours ago    83.1MB
dragonflyoss/manager                        latest    112c77dbd763   8 hours ago    142MB
dragonflyoss/scheduler                      latest    beea9d38465f   8 hours ago    104MB


(⎈|kind-myk8s:default) zosys@4:~/kustomize-test$ cat << EOF > charts-config.yaml
manager:
  image:
    repository: dragonflyoss/manager
    tag: latest
  metrics:
    enable: true

scheduler:
  image:
    repository: dragonflyoss/scheduler
    tag: latest
  metrics:
    enable: true

seedClient:
  image:
    repository: dragonflyoss/client
    tag: latest
  metrics:
    enable: true

client:
  image:
    repository: dragonflyoss/client
EOF           capabilities: ['pull', 'resolve']io
(⎈|kind-myk8s:default) zosys@4:~/kustomize-test$ helm repo add dragonfly https://dragonflyoss.github.io/helm-charts/
"dragonfly" has been added to your repositories
(⎈|kind-myk8s:default) zosys@4:~/kustomize-test$ helm install --wait --create-namespace --namespace dragonfly-system dragonfly dragonfly/dragonfly -f charts-config.yaml


(⎈|kind-myk8s:default) zosys@4:~/kustomize-test$ helm install --wait --create-namespace --namespace dragonfly-system dragonfly dragonfly/dragonfly -f charts-config.yaml
NAME: dragonfly
LAST DEPLOYED: Fri Oct 17 01:37:44 2025
NAMESPACE: dragonfly-system
STATUS: deployed
REVISION: 1
TEST SUITE: None
NOTES:
1. Get the manager address by running these commands:
  export MANAGER_POD_NAME=$(kubectl get pods --namespace dragonfly-system -l "app=dragonfly,release=dragonfly,component=manager" -o jsonpath={.items[0].metadata.name})
  export MANAGER_CONTAINER_PORT=$(kubectl get pod --namespace dragonfly-system $MANAGER_POD_NAME -o jsonpath="{.spec.containers[0].ports[0].containerPort}")
  kubectl --namespace dragonfly-system port-forward $MANAGER_POD_NAME 8080:$MANAGER_CONTAINER_PORT
  echo "Visit http://127.0.0.1:8080 to use your manager"

2. Get the scheduler address by running these commands:
  export SCHEDULER_POD_NAME=$(kubectl get pods --namespace dragonfly-system -l "app=dragonfly,release=dragonfly,component=scheduler" -o jsonpath={.items[0].metadata.name})
  export SCHEDULER_CONTAINER_PORT=$(kubectl get pod --namespace dragonfly-system $SCHEDULER_POD_NAME -o jsonpath="{.spec.containers[0].ports[0].containerPort}")
  kubectl --namespace dragonfly-system port-forward $SCHEDULER_POD_NAME 8002:$SCHEDULER_CONTAINER_PORT
  echo "Visit http://127.0.0.1:8002 to use your scheduler"


(⎈|kind-myk8s:default) zosys@4:~/kustomize-test$ kubectl get deploy,ds,sts -n dragonfly-system
NAME                                READY   UP-TO-DATE   AVAILABLE   AGE
deployment.apps/dragonfly-manager   3/3     3            3           7m56s

NAME                              DESIRED   CURRENT   READY   UP-TO-DATE   AVAILABLE   NODE SELECTOR   AGE
daemonset.apps/dragonfly-client   1         1         1       1            1           <none>          7m56s

NAME                                        READY   AGE
statefulset.apps/dragonfly-mysql            1/1     7m56s
statefulset.apps/dragonfly-redis-master     1/1     7m56s
statefulset.apps/dragonfly-redis-replicas   3/3     7m56s
statefulset.apps/dragonfly-scheduler        3/3     7m56s
statefulset.apps/dragonfly-seed-client      3/3     7m56s

(⎈|kind-myk8s:default) zosys@4:~/kustomize-test$ kubectl get pod -n dragonfly-system
NAME                                 READY   STATUS    RESTARTS        AGE
dragonfly-client-bn74x               1/1     Running   0               8m9s
dragonfly-manager-6dc775cccb-jgjgw   1/1     Running   0               8m9s
dragonfly-manager-6dc775cccb-jxnkz   1/1     Running   0               8m9s
dragonfly-manager-6dc775cccb-nlfqs   1/1     Running   0               8m9s
dragonfly-mysql-0                    1/1     Running   0               8m9s
dragonfly-redis-master-0             1/1     Running   0               8m9s
dragonfly-redis-replicas-0           1/1     Running   1 (7m4s ago)    8m9s
dragonfly-redis-replicas-1           1/1     Running   0               6m38s
dragonfly-redis-replicas-2           1/1     Running   0               6m9s
dragonfly-scheduler-0                1/1     Running   0               8m9s
dragonfly-scheduler-1                1/1     Running   0               5m26s
dragonfly-scheduler-2                1/1     Running   0               5m13s
dragonfly-seed-client-0              1/1     Running   2 (5m44s ago)   8m9s
dragonfly-seed-client-1              1/1     Running   0               5m
dragonfly-seed-client-2              1/1     Running   0               4m23s